


Dental instrument costs add up quietly: a lost curette here, a rusted forceps there, and a drawer full of rarely used patterns nobody remembers ordering. The good news is that most savings come from better habits rather than cheaper instruments. These ten strategies help clinics, groups and schools spend less over the life of their instruments while keeping quality high.
Key takeaways
- The cheapest instrument is often the most expensive over its lifetime.
- Correct cleaning, drying and lubrication extend service life significantly.
- Standardizing patterns and building procedure kits reduce duplication and loss.
- Volume buying and good inventory tracking turn instrument spend into a planned cost.
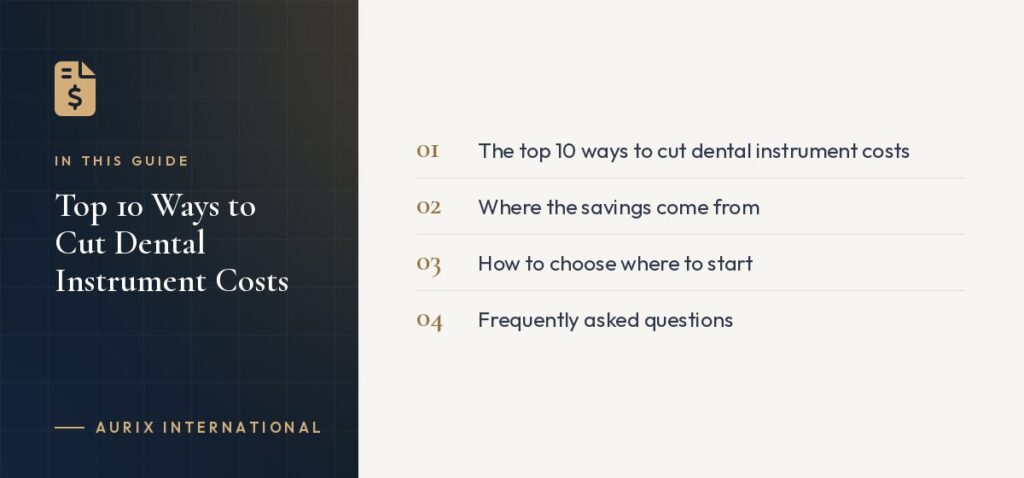
The top 10 ways to cut dental instrument costs
1. Think in total cost of ownership, not unit price
An instrument’s real cost includes the purchase price, how long it lasts, how often it needs sharpening or repair, and how much chair time is lost when it fails. A well-made curette that holds its edge and survives years of reprocessing usually costs less per use than a cheaper one replaced every few months.
Our article on the total cost of ownership of dental instruments shows how to compare options properly.
2. Clean instruments promptly after use
Blood, saliva and cement that dry on instruments are harder to remove and can contribute to staining and corrosion. Keep instruments moist with a suitable pre-cleaning product or by placing them in a holding solution if they cannot be cleaned right away, following the manufacturer’s IFU. Prompt cleaning protects both the instrument and your infection-control results.
3. Use the right cleaning and sterilization practices
Many instruments are damaged in the sterilization room rather than at chairside. Common causes include harsh or incorrectly diluted detergents, overloaded ultrasonic baskets, long soaking times, poor water quality and loading wet instruments into pouches. Follow the instrument and equipment manufacturers’ IFUs and CDC guidance, and train staff consistently.
4. Dry thoroughly and lubricate hinged instruments
Moisture trapped in joints and serrations is a leading cause of rust and stiff hinges. Make sure instruments are completely dry before packaging, and lubricate forceps, needle holders, scissors and pliers with an instrument lubricant compatible with steam sterilization, as the IFU directs. See our guide to lubricating hinged instruments for the method.
5. Sharpen regularly instead of replacing early
Dull scalers and curettes waste chair time, cause hand fatigue and are often thrown away long before the end of their useful life. Regular sharpening with a stone or sharpening system keeps blades effective and helps you get full value from each instrument. Replace them when the blade becomes too thin or weak, not simply because it feels dull.
6. Standardize patterns across the practice
When every clinician orders their own favorite variations, you end up with many patterns bought in small numbers. Agree on a core set of instruments for each procedure, with a few documented exceptions. Standardizing simplifies ordering, training, tray setup and replacement, and often unlocks better volume pricing.
7. Build procedure kits and cassettes
Organizing instruments into procedure-specific kits or cassettes reduces handling, loss and damage. Instruments held securely in a cassette are less likely to be dropped, bent or mixed with other trays, and staff spend less time searching for items. Pre-assembled or custom kits also make it obvious when something is missing.
8. Track your inventory
Knowing exactly what you own, where it is and how old it is prevents both emergency purchases and unnecessary over-ordering. Even a simple spreadsheet listing instruments per tray, purchase date and condition helps. Color coding or laser marking can also reduce loss between rooms or locations.
9. Buy in volume where it makes sense
Multi-chair practices, DSOs and schools can often negotiate better terms by consolidating orders for high-use instruments. Combine orders across locations, plan purchases ahead of need, and discuss tiered pricing with your supplier. Our guide to buying dental instruments in bulk covers the pros and cons.
10. Inspect and repair before you replace
Monthly inspection catches small problems such as stiff joints, slight tip misalignment or early pitting before they ruin an instrument. Some issues can be corrected by repair or re-tipping, and catching corrosion early lets you fix the reprocessing step that caused it. Remove damaged instruments from service promptly so they do not cause further problems.
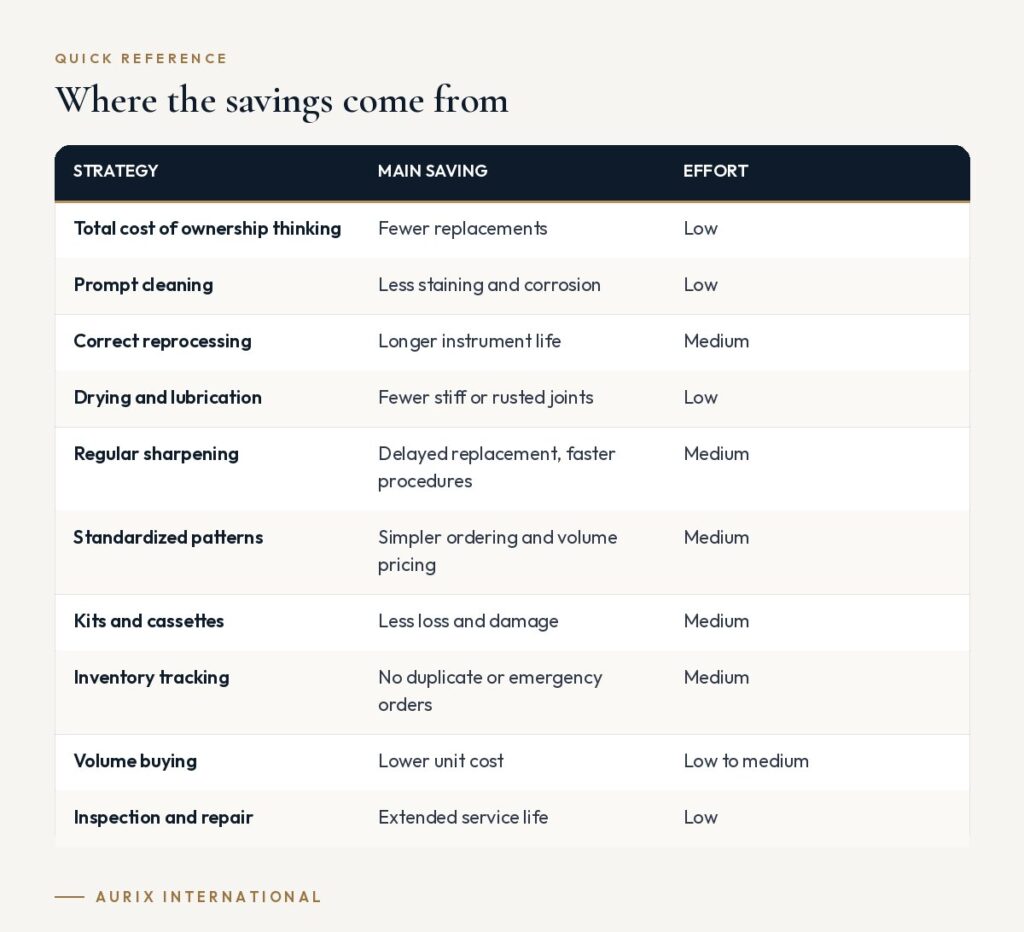
Where the savings come from
| Strategy | Main saving | Effort |
|---|---|---|
| Total cost of ownership thinking | Fewer replacements | Low |
| Prompt cleaning | Less staining and corrosion | Low |
| Correct reprocessing | Longer instrument life | Medium |
| Used when drying and lubrication | Fewer stiff or rusted joints | Low |
| Regular sharpening | Delayed replacement, faster procedures | Medium |
| Standardized patterns | Simpler ordering and volume pricing | Medium |
| Kits and cassettes | Less loss and damage | Medium |
| Inventory tracking | No duplicate or emergency orders | Medium |
| Volume buying | Lower unit cost | Low to medium |
| Inspection and repair | Extended service life | Low |
How to choose where to start
You do not need to tackle everything at once. A practical order is:
- Audit what you have. Count instruments per tray and note damaged, duplicate and unused items.
- Fix reprocessing habits that damage instruments, since these cost money every day.
- Agree on standard kits for your most common procedures.
- Consolidate purchasing with a reliable supplier for your core instruments.
- Review every six to twelve months to see which changes made the biggest difference.
Avoid cutting costs by buying instruments of unknown quality. Saving money on the purchase price is easily lost if instruments dull, corrode or break early. If you want to reduce the time spent sorting instruments, our guide to organizing cassettes for faster turnover is a good next step.
Frequently asked questions
Are cheaper instruments ever worth it?
For rarely used items, a modest-cost instrument may be perfectly adequate. For high-use cutting instruments, forceps and pliers, quality usually pays off through longer life and better performance.
How often should instruments be inspected?
Check instruments at every use for obvious damage, and carry out a more thorough inspection, including joints, tips and blades, roughly monthly or according to your own protocol.
Do custom kits really save money?
They can, by reducing duplicate purchases, lost instruments and setup time. The biggest benefit is usually consistency: every tray contains exactly what is needed, nothing more.
Spend smarter on instruments. Aurix International offers wholesale options for clinics, groups and schools that want consistent quality and planned purchasing. Explore wholesale →


