


Crown and bridge instruments support every stage of fixed prosthodontic work: tissue retraction before impressions, fitting and adjusting provisional and permanent restorations, cementation, and removal when a crown needs to come off. Many of these instruments are used only in crown and bridge appointments, so they are often kept in a dedicated cassette. Here are the 10 instruments most practices rely on, with practical tips for each.
Key takeaways
- Good retraction with a cord packer is the starting point for accurate impressions or scans.
- Crown scissors and contouring pliers are essential for provisional and preformed crowns.
- Thorough removal of excess cement protects the gingiva after cementation.
- Crown removers should be used carefully and only with the right tip for the situation.
The top 10 crown and bridge instruments
1. Gingival retraction cord packer
The cord packer places retraction cord into the gingival sulcus to displace tissue and control fluids before an impression or scan. Working ends may be serrated, to grip the cord, or smooth, and they come in different widths and angles for anterior and posterior teeth.
Tip: Pack cord with gentle, angled pressure toward the tooth already packed, so the cord does not pull out of the sulcus behind you.
2. Crown and collar scissors
Crown and collar scissors have short, sturdy, often curved blades designed to trim the margins of provisional crowns, preformed crowns and matrix materials. The curve helps follow the crown’s contour.
Keep them for crown materials only; cutting other items dulls the blades.
3. Contouring and crimping pliers
Contouring pliers shape the walls of preformed metal crowns and bands, and crimping pliers bend the margins inward so the crown fits snugly at the cervical area. Also, they are widely used for stainless steel crowns, especially in pediatric dentistry.
4. Cement spatula
A stiff or flexible stainless steel spatula mixes luting cements and temporary cements on a pad or glass slab. Flexible blades suit creamy cements; stiffer blades suit thicker mixes.
Tip: Clean the spatula immediately after mixing, before the cement sets on the blade.
5. Crown seater (bite stick)
A crown seater is placed on the occlusal surface of a crown so the patient can bite down and seat it fully during try-in or cementation. Seaters with serrated or textured tips resist slipping.
6. Explorer or scaler for cement removal
After cementation, an explorer or fine scaler removes excess cement from margins and the sulcus. Leftover cement can irritate the gingiva, so this step deserves time and good visibility.
Check the cement manufacturer’s guidance on when to remove excess, as the ideal timing varies with the material.
7. Articulating paper forceps
Articulating paper forceps (such as the Miller pattern) hold articulating paper or film to mark contacts during occlusal adjustment of provisional and final restorations.
8. Thickness caliper
A thickness caliper or gauge measures the thickness of crown walls, provisional restorations or wax patterns. This helps confirm that there is enough material, especially after adjustment, before the restoration is cemented.
9. Crown remover
Crown removers apply a controlled force to dislodge crowns and bridges. Common designs include the back-action (slide hammer) type, with interchangeable tips that engage the crown margin, and pneumatic or spring-loaded devices.
Tip: Explain the procedure to the patient, support the tooth or bridge where possible, and use the smallest effective force to reduce the risk of damage to the tooth or restoration.
10. Temporary crown removing forceps
Temporary crown removing forceps grip provisional crowns with padded or textured beaks so they can be removed without excessive force. They are useful at the appointment when the final restoration is fitted.
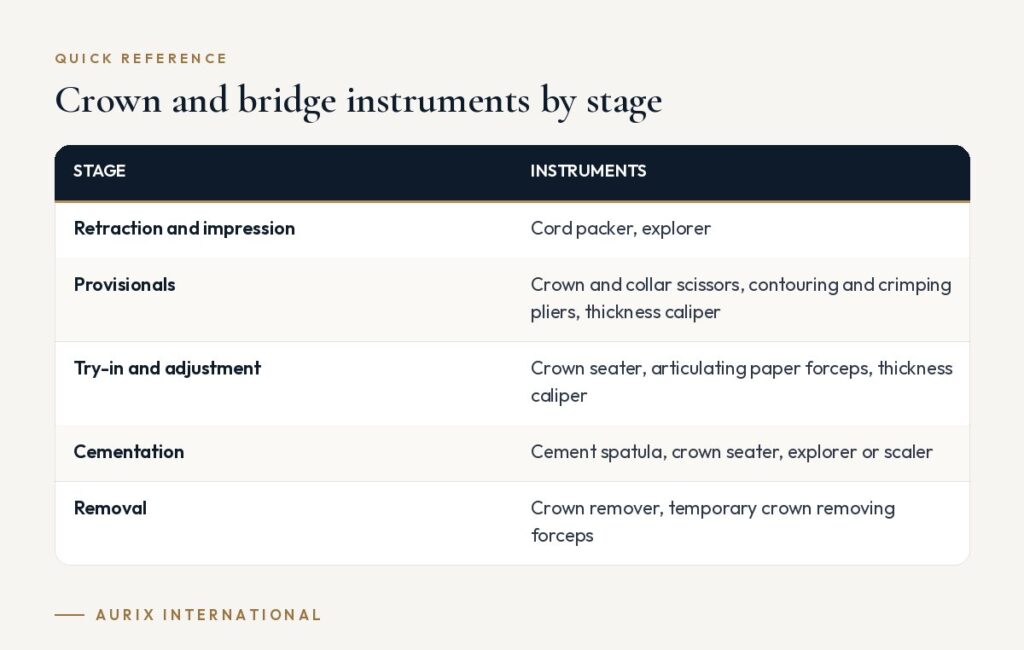
Crown and bridge instruments by stage
| Stage | Instruments |
|---|---|
| Retraction and impression | Cord packer, explorer |
| Provisionals | Crown and collar scissors, contouring and crimping pliers, thickness caliper |
| Try-in and adjustment | Crown seater, articulating paper forceps, thickness caliper |
| Cementation | Cement spatula, crown seater, explorer or scaler |
| Removal | Crown remover, temporary crown removing forceps |
How to choose crown and bridge instruments
- Build a dedicated cassette. Keeping crown and bridge instruments together saves searching at the chair. See our guide to setting up a restorative tray for layout ideas.
- Pick cord packer tips for your cases. Thin tips suit anterior teeth and tight sulci; wider tips work well posteriorly.
- Check blade quality. Crown scissors should cut cleanly to the tip without folding the material.
- Choose good mixing tools. Our overview of cement spatulas, carvers and burnishers explains blade choices.
- Inspect explorers regularly. Sharp tips are essential for finding cement at margins. Our guide to dental explorers covers common patterns.
- Reprocess correctly. Clean, package and sterilize according to the manufacturer’s instructions for use (IFU) and CDC guidance.
Many of these instruments overlap with general operative work, so see also the top 10 restorative dental instruments. Aurix International supplies crown and bridge hand instruments individually and in custom kits.
Care and maintenance
Crown and bridge instruments often come into contact with cements and impression materials, which are much harder to remove once set. Wipe instruments during the procedure, clean them promptly afterward, and check scissors and contouring pliers for smooth action and clean cutting. In addition, replace cord packers with bent or burred tips, as they can snag the cord and tear tissue.
Frequently asked questions
What is a cord packer used for?
It places retraction cord into the gingival sulcus to expose the preparation margin and control fluids before an impression or scan.
How do you remove excess cement after seating a crown?
Use an explorer or fine scaler around the margins and floss through the contacts, following the cement manufacturer’s guidance on timing.
Are crown removers safe for the tooth?
Used carefully, with the right tip and minimal force, they are a common way to remove crowns. There is always some risk of damaging the restoration or tooth, which should be discussed with the patient.
Why use crimping pliers on preformed crowns?
Crimping bends the crown margin inward so it fits snugly at the cervical area, improving retention and marginal fit.
Keep your crown and bridge instruments in one ready-to-use kit. Aurix can assemble cord packers, crown scissors, pliers and finishing instruments into a cassette built around your workflow. Design your kit →


