


A well-organized restorative tray is one of the simplest ways to make filling appointments run smoothly. When the instruments are the same in every operatory and laid out in order of use, the assistant can anticipate each step and the clinician spends less time waiting. Below are the 10 instruments most restorative trays are built around, the order they are usually placed in, and the extras worth adding for specific procedures.
Key takeaways
- Start every restorative tray with the basic setup: mirror, explorer and cotton pliers.
- Lay instruments out left to right in the order they are used.
- Keep procedure-specific extras (amalgam carrier, sectional rings) in a separate cassette or add-on pack.
- Standardizing the tray across rooms speeds setup, restocking and staff training.

The top 10 instruments for a restorative tray
1. Mouth mirror
The mirror comes first on the tray and stays in the clinician’s non-dominant hand for most of the procedure. It provides indirect vision, retraction and light reflection.
Tip: Include a spare mirror head in the cassette. A fogged or scratched mirror slows down margin checks more than almost anything else.
2. Explorer
The explorer is used to check margins, detect overhangs and evaluate the finished restoration. A double-ended pattern, such as a No. 23 shepherd’s hook paired with a No. 17, covers most needs.
3. Cotton pliers
Cotton pliers (also called college pliers or dressing pliers) are used to place and remove cotton rolls, pellets, wedges and small items in and out of the mouth. Locking versions are useful for holding a pellet steady while placing a liner or medicament.
Serrated tips grip better than smooth tips; check that the tips meet evenly along their length.
4. Spoon excavator
The spoon excavator removes soft carious dentin and old temporary material. A double-ended medium size suits most trays; a small size helps in narrow preparations.
Tip: Check sharpness at every reprocessing cycle. Dull excavators are one of the most common complaints from clinicians about restorative trays.
5. Hand cutting instrument
Most restorative trays carry at least one hand cutting instrument, such as an enamel hatchet or a pair of gingival margin trimmers, to refine walls and margins after bur preparation. Trays for Class II work benefit from both mesial and distal gingival margin trimmers.
6. Matrix retainer
For any restoration that involves a proximal surface, the matrix system recreates the missing wall. Many trays include a Tofflemire retainer with a selection of bands; practices that favor sectional matrices keep rings and contoured bands in an add-on pack instead.
Our explainer on Tofflemire vs sectional matrix systems compares the two approaches.
7. Plastic filling instrument
A double-ended plastic filling instrument (paddle at one end, plugger at the other) carries and shapes composite, liners and temporary materials. For composite trays, choose polished or non-stick tips.
8. Condenser
Condensers compact the material into the preparation. Composite trays often use small ball- or flat-ended pluggers, while amalgam trays need several face diameters, starting small for line angles and moving to larger faces.
Tip: If you place both materials, keep separate condensers labeled for amalgam and composite.
9. Carver
A carver such as the discoid-cleoid or Hollenback removes excess material and restores occlusal and proximal anatomy before the material sets. Many trays pair it with a ball or football burnisher for smoothing and adapting margins.
10. Articulating paper forceps
Articulating paper forceps (often the Miller pattern) hold articulating paper or film so the patient can bite and the clinician can see high spots. They finish the tray because occlusal adjustment is usually the last step before polishing.
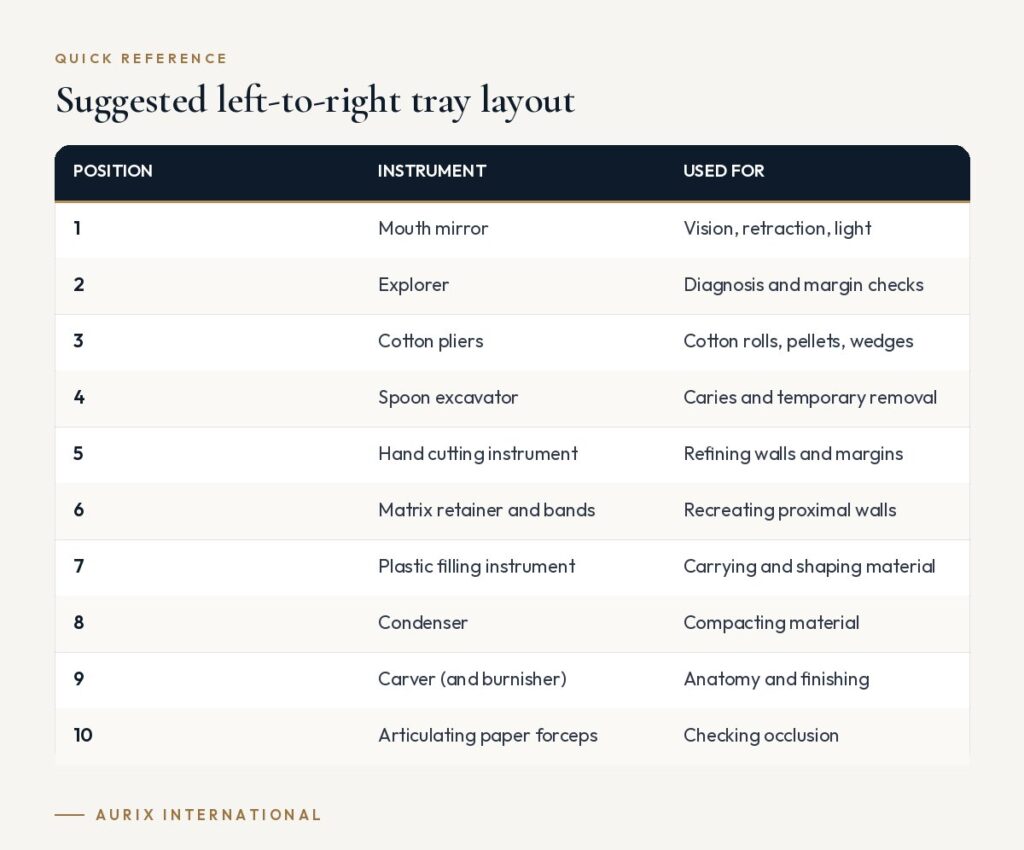
Suggested left-to-right tray layout
| Position | Instrument | Used for |
|---|---|---|
| 1 | Mouth mirror | Vision, retraction, light |
| 2 | Explorer | Diagnosis and margin checks |
| 3 | Cotton pliers | Cotton rolls, pellets, wedges |
| 4 | Spoon excavator | Caries and temporary removal |
| 5 | Hand cutting instrument | Refining walls and margins |
| 6 | Matrix retainer and bands | Recreating proximal walls |
| 7 | Plastic filling instrument | Carrying and shaping material |
| 8 | Condenser | Compacting material |
| 9 | Carver (and burnisher) | Anatomy and finishing |
| 10 | Articulating paper forceps | Checking occlusion |
Useful extras for specific procedures
- Amalgam: amalgam carrier, amalgam well, additional condensers and burnishers.
- Composite: sectional matrix rings and ring forceps, wedges, interproximal composite instrument, composite gun for compules.
- Liners and cements: cement spatula, ball-ended liner applicator, mixing pad.
- Isolation: rubber dam kit (punch, forceps, frame and clamps), held in its own cassette.
Tips for building and maintaining a restorative tray
- Use cassettes. Keeping the tray in a closed cassette through cleaning and sterilization protects tips, keeps the set complete and reduces handling of sharp instruments. See why cassettes and trays matter.
- Standardize across rooms. The same instruments in the same positions make training simpler and cut setup time. Our tips on organizing cassettes for faster turnover go into more detail.
- Keep the core small. A lean core tray plus add-on packs is easier to manage than one oversized tray that tries to cover every procedure.
- Inspect every cycle. Check excavator sharpness, explorer tips and the hinge action of cotton pliers and forceps. Replace or resharpen as needed.
- Reprocess correctly. Follow the manufacturer’s instructions for use (IFU) and CDC guidance for cleaning, packaging and sterilization.
For a broader look at the instruments themselves, see our list of the top 10 restorative dental instruments. If you prefer a ready-made setup, Aurix International supplies pre-assembled kits as well as custom trays built around your own instrument list.
Frequently asked questions
What is the basic setup on a dental tray?
The basic setup is a mouth mirror, an explorer and cotton pliers. These three instruments start almost every tray, whether for examination, hygiene or restorative work.
Should amalgam and composite trays be different?
Many practices keep them separate. Composite benefits from non-stick placement instruments and sectional matrices, while amalgam needs a carrier and multiple condensers. A shared core with material-specific add-ons is a common compromise.
How many restorative trays does a practice need?
Enough to cover the number of restorative appointments between sterilization cycles, plus a buffer for instruments out for repair. Counting trays used on your busiest day is a practical starting point.
Where should the rubber dam kit go?
Usually in its own cassette or pack, opened when needed. This keeps the core restorative tray compact.
Get the same restorative tray in every room. Aurix can assemble your restorative instruments into a consistent kit, from the basic setup to finishing tools. Build your restorative tray →


